
When most people think of WordPress, they think “blog.” And while WordPress is one of the world’s largest blogging platforms, WordPress is also a complete content management system and is a great way to build many different types of websites. I’ve used WordPress, hosted on Bluehost to build countless sites for my clients over the last 8+ years. This article will show you how easy it can be to get your blog, or website, up and running quickly.
Choosing a Web Host
There are many hosting companies out there, but for a WordPress site, Bluehost should definitely be at the top of anyone’s list. Bluehost has been my personal web hosting company of choice since 2008 and is the only hosting service officially recommended by WordPress and has been the number-one recommended hosting service for their platform for almost 10 years. There are many reasons why Bluehost is so highly recommended, but here are just a few:
- Premium customer service, reliability and usability
- Easy-to-use control panel
- Custom-built servers to provide the most stable and reliable hosting environment
- Quickly get started with our one-click WordPress install provided by MOJO Marketplace
- Expert, in-house technical support provided 24 hours a day, 7 days a week
- Unlimited websites, email accounts, and domains – all on one account at an affordable price
- No gimmicks, no contracts. Enjoy the comfort of a 30-day money back guarantee and the option to cancel at any time.
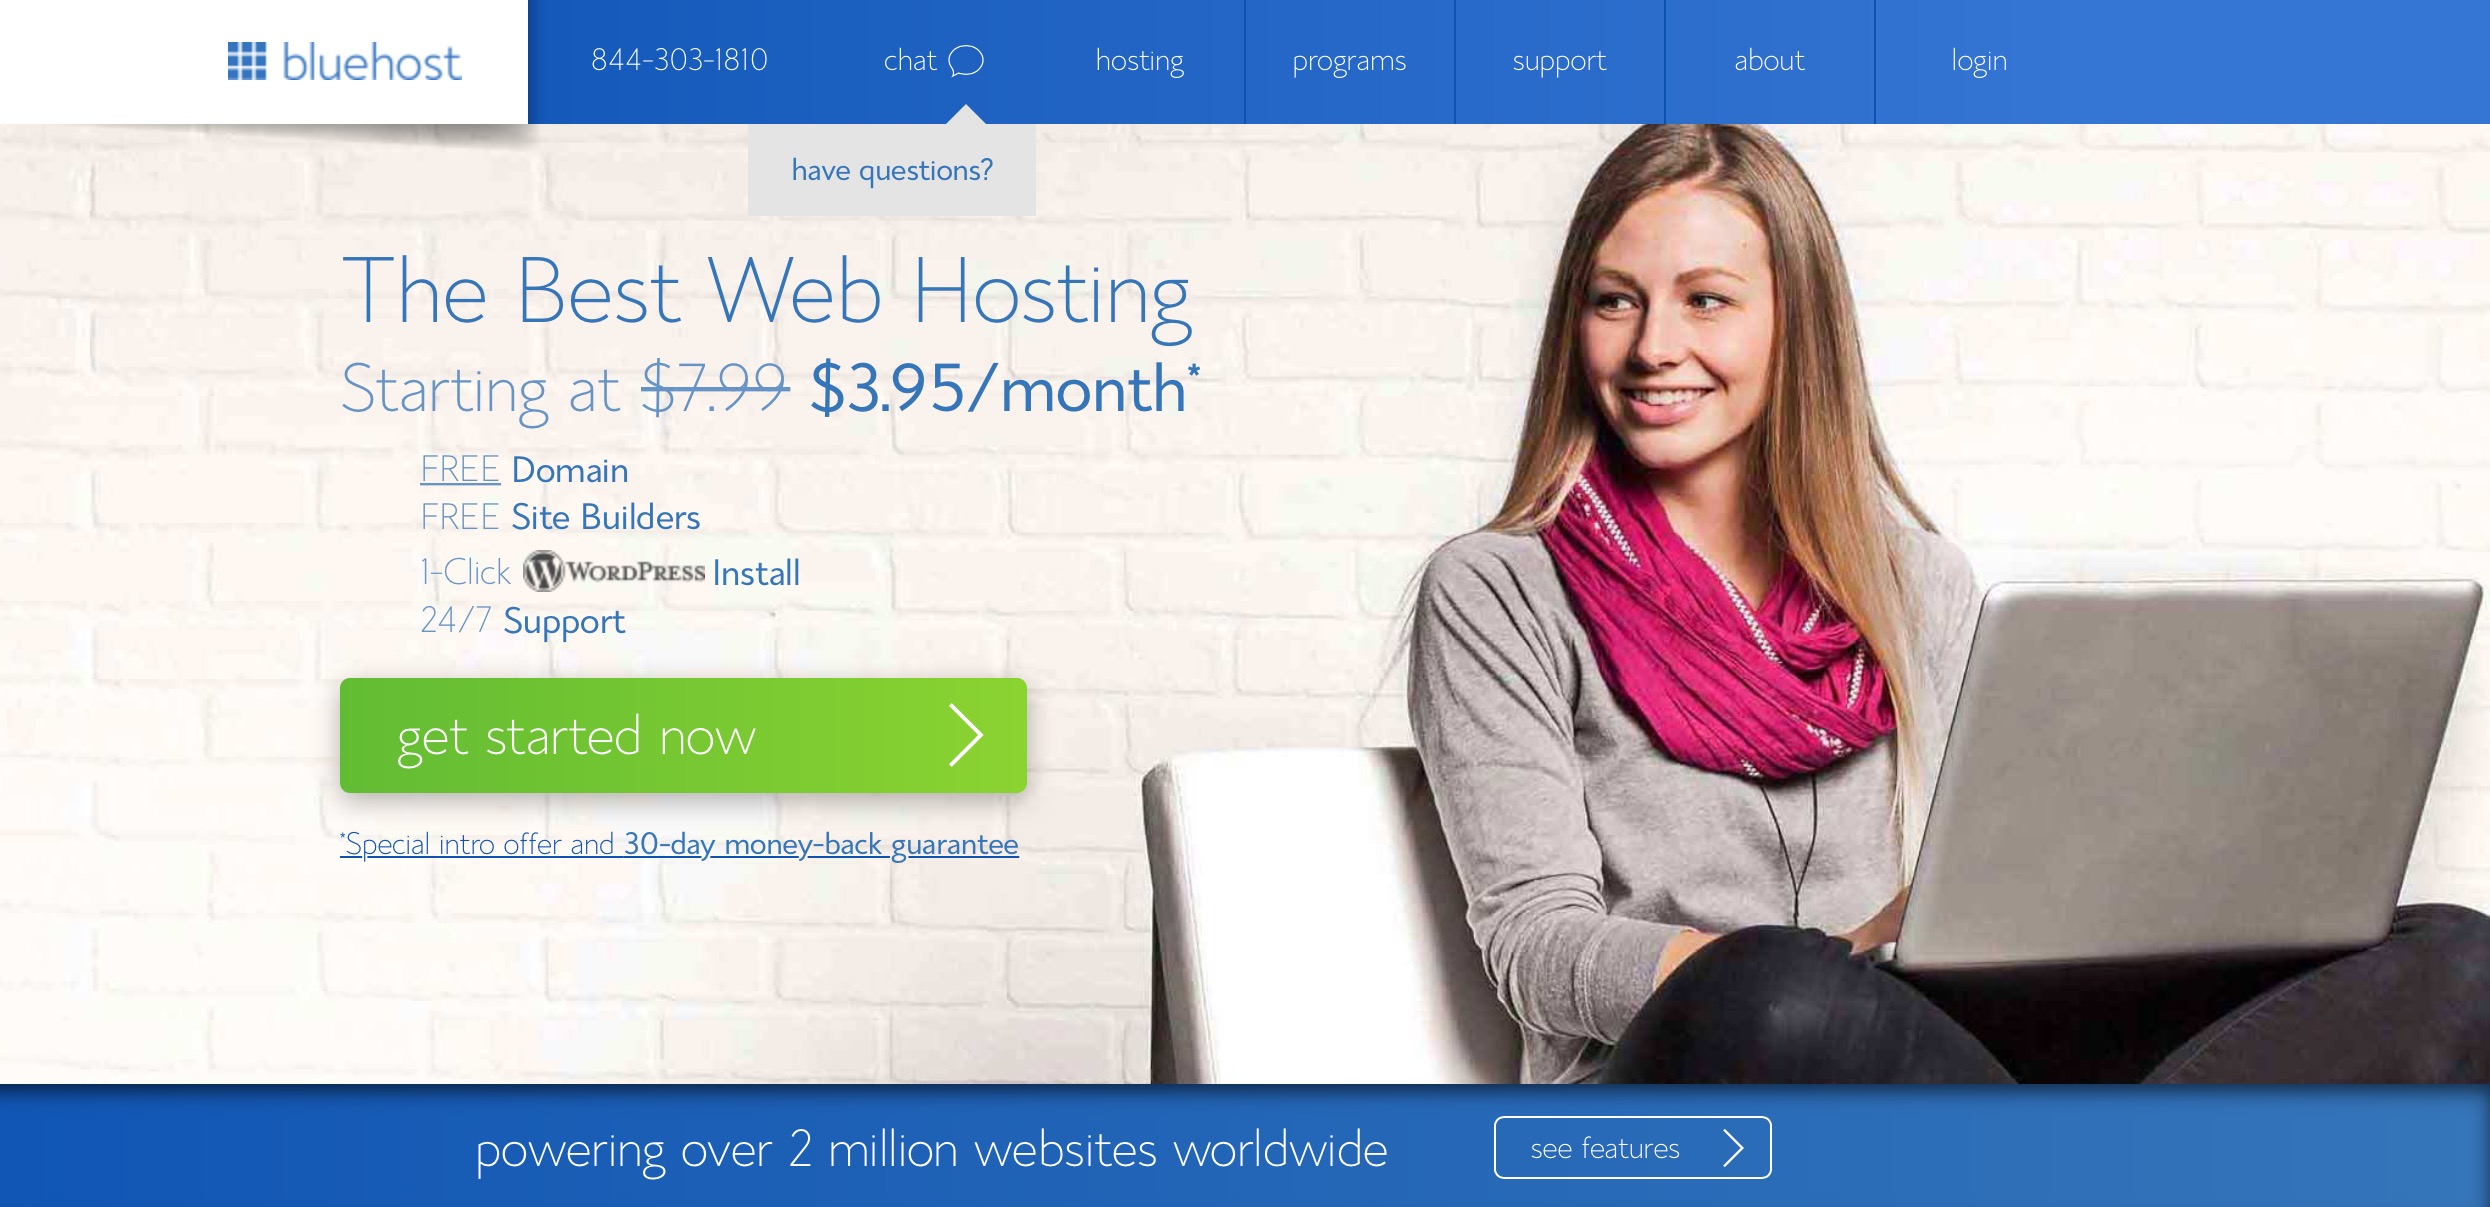
And to sweeten the deal even more, if you sign up through this tutorial, you’ll get a special offer of shared hosting at $3.95/month for 36 months, as well as a free domain name for a year!
To set up your hosting account with Bluehost, follow the steps below. It will speed up the process to think of a domain name you want to use and to have your credit card for payment ready to go before you get started.
Set Up Your Hosting Account
To get started, go to Bluehost’s home page and click “ get started now.”
Choose Your Plan
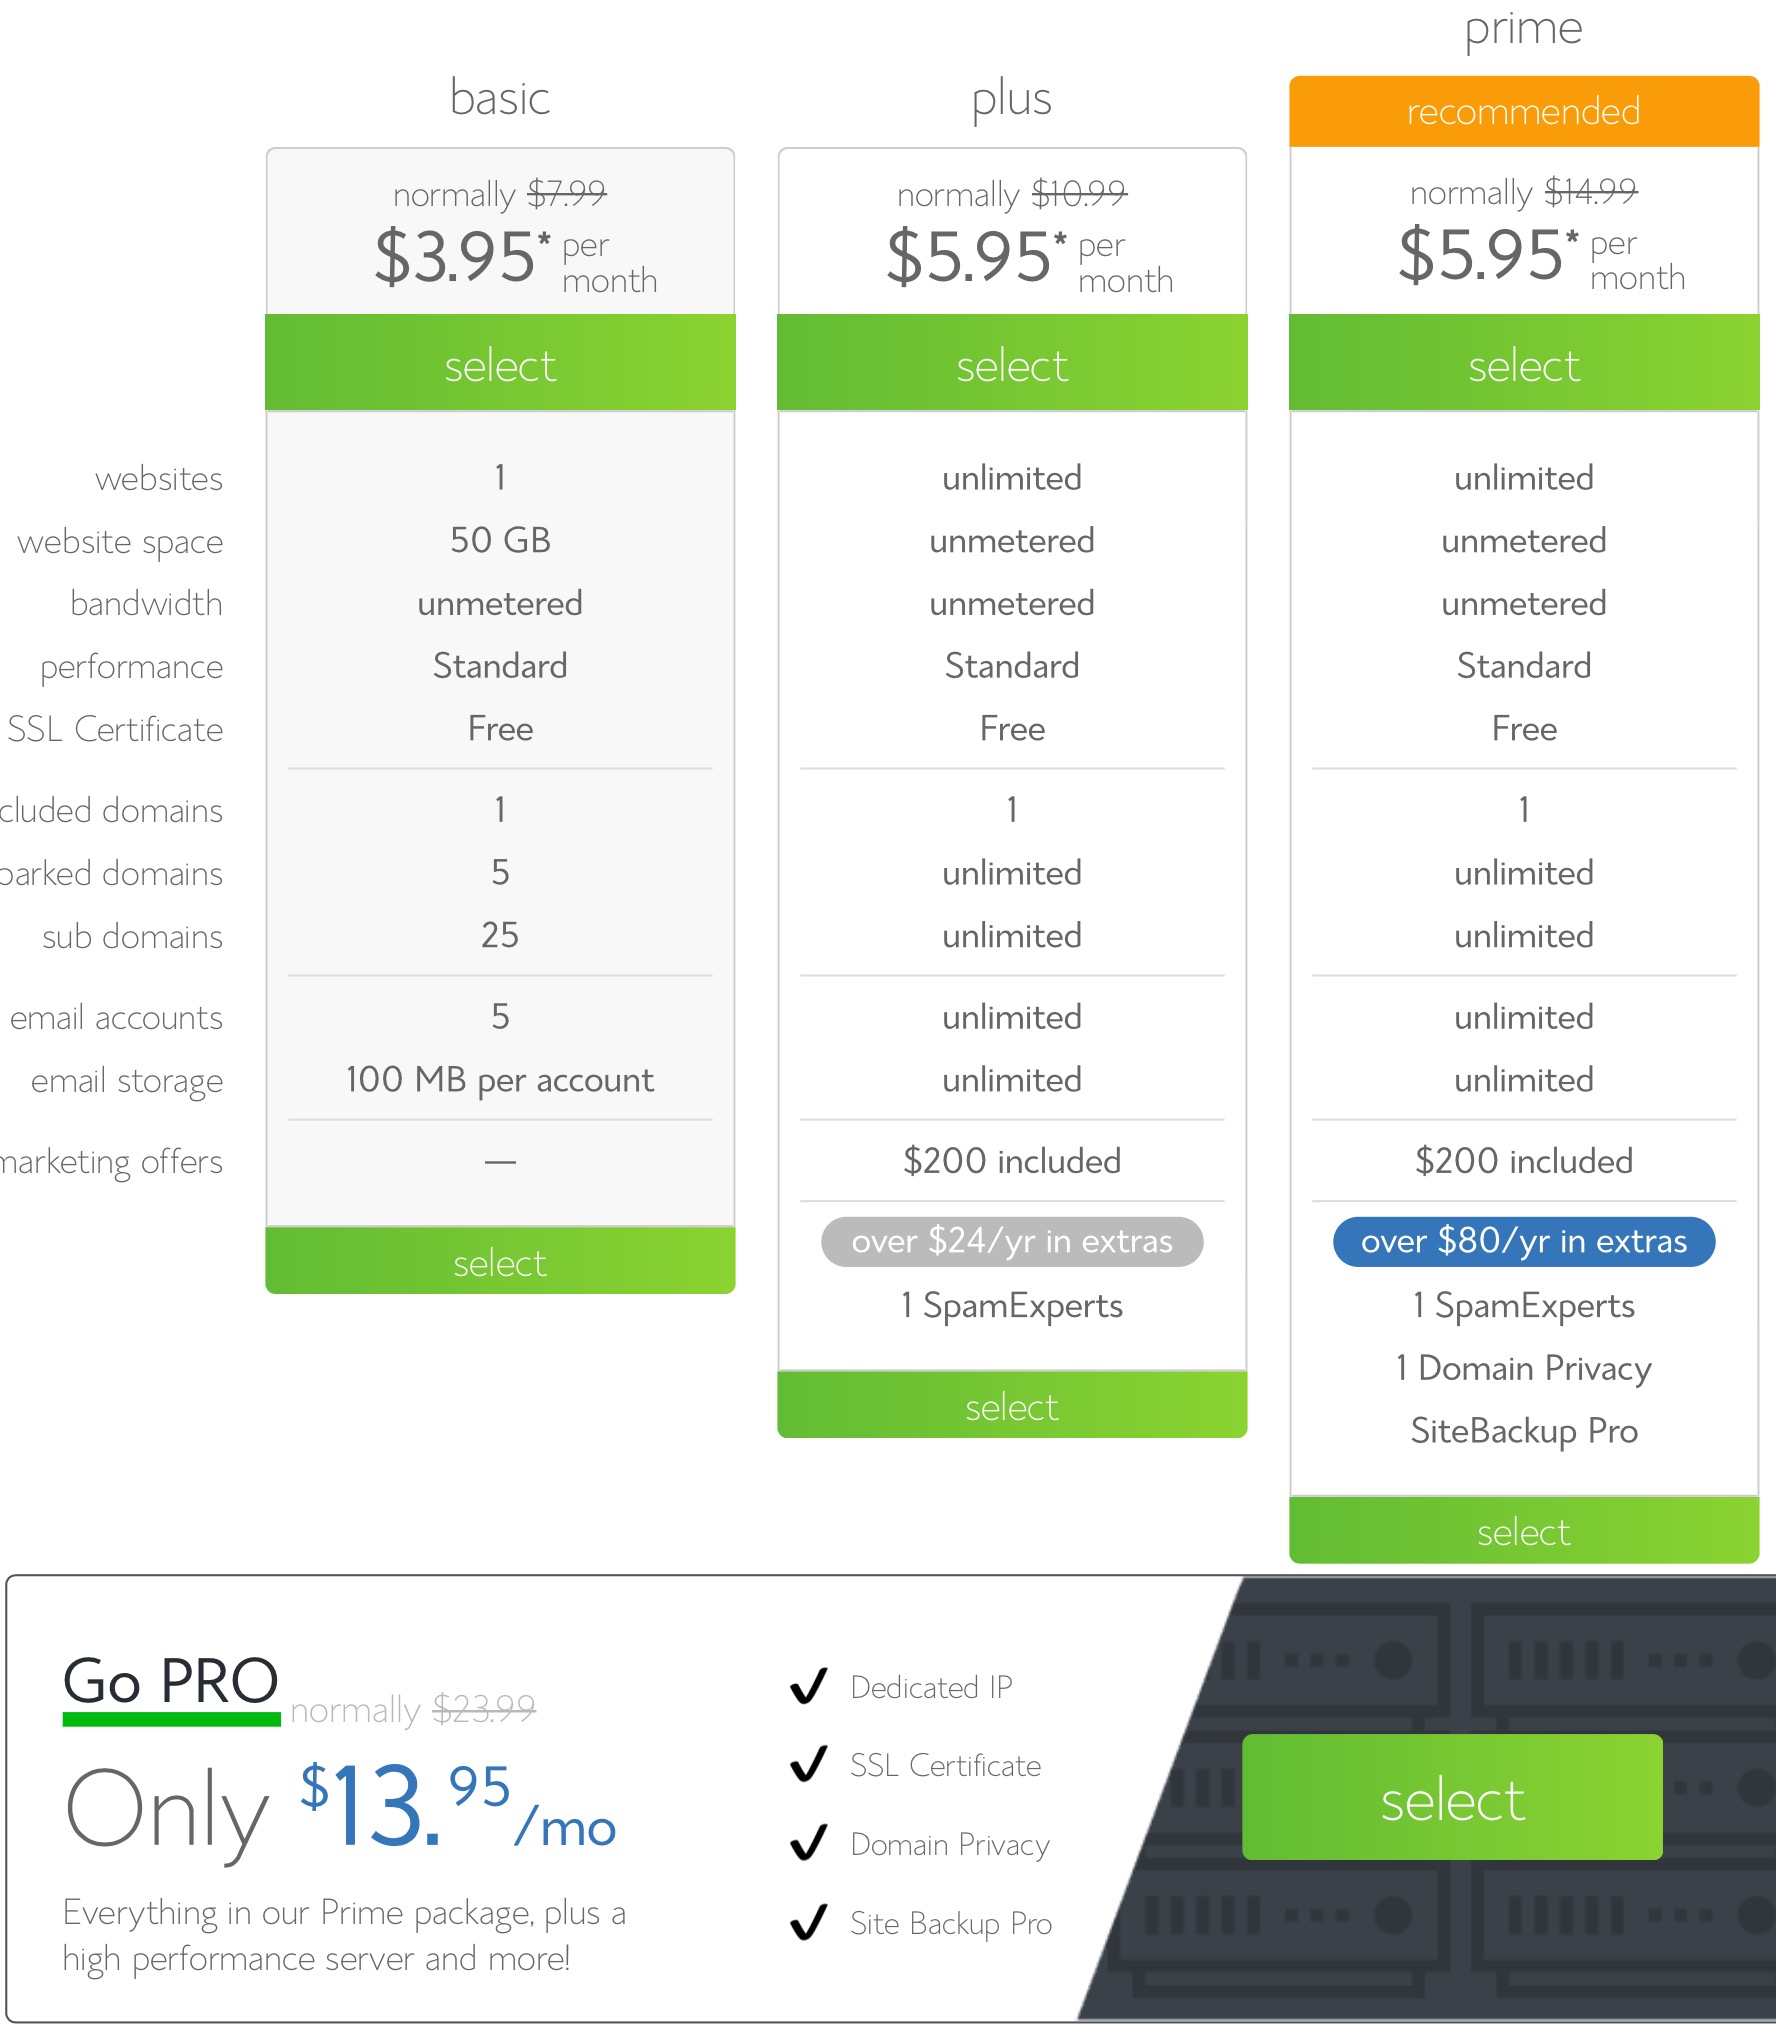
Basic, shared hosting is priced at 12, 24 and 36-month terms. To help save you money, the longer term you purchase, the lower the monthly rate will be. For example, by choosing a 36-month hosting term, you can get the great introductory rate of $3.95/month. And, because you’ve chosen to host with Bluehost, if you ever need more than a shared hosting account, Bluehost provides seamless upgrades to VPS or dedicated server hosting accounts from inside your control panel.
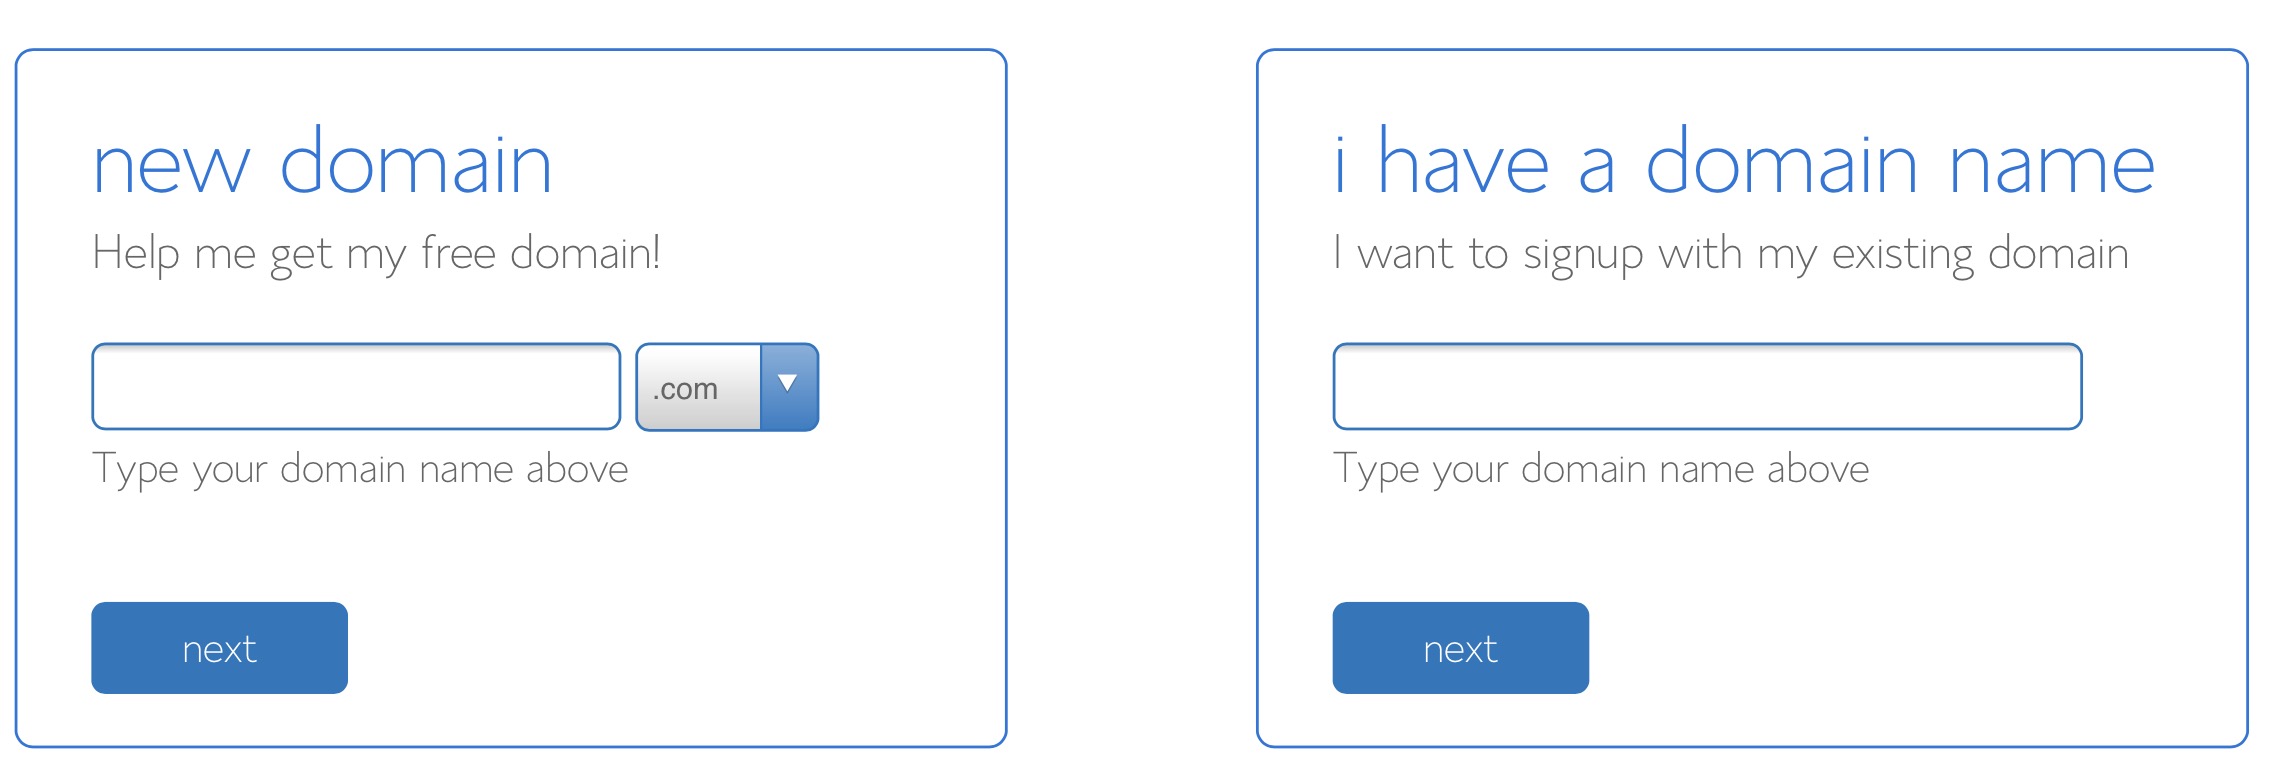
Choose your domain name
Next, you need to choose a domain name for your site. If you already own a domain name, you can enter it here, and you will just have to go through a few extra steps to make sure you get your DNS pointed to Bluehost. If you don’t already have a domain name, you can purchase one from right in the sign up process, and the best part is, it comes free with your new WordPress hosting account purchase.
Once you’ve chosen a domain name, you’ll fill in your personal information:
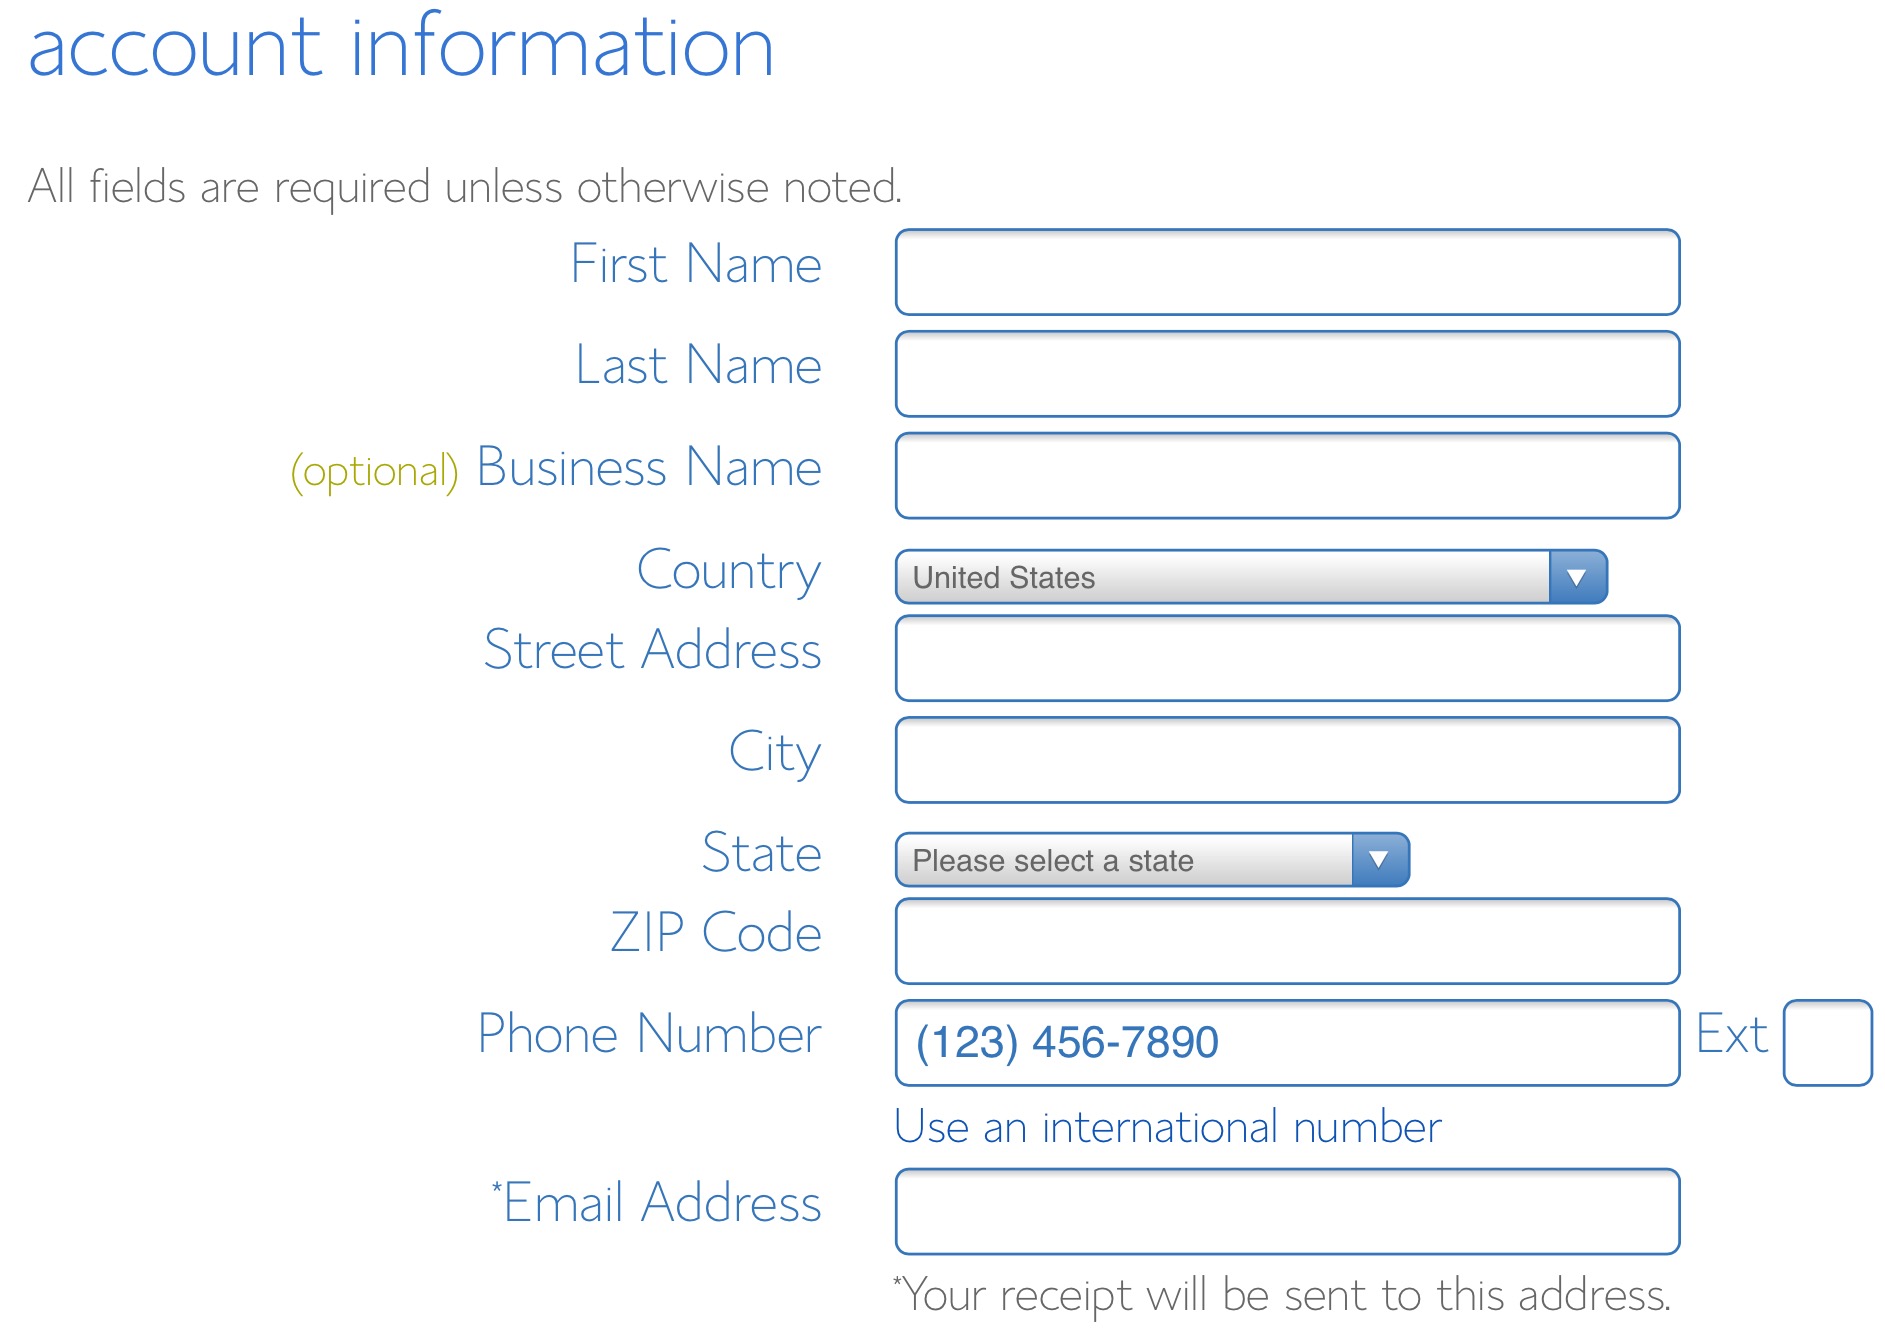
There are few other offers provided at sign up, which you can include at your discretion. While I personally don’t use it, one I would recommend, is Domain Privacy, a paid service that allows personal information to be kept private on WHOIS databases.
After you’ve filled in your information and chosen any of the optional offers for your hosting package, click the “Submit” button to complete your purchase. You’ll then be asked to create a password for your account. You can use the Password Generator to create a strong and secure password, or create one yourself. It is required to have both capital and lowercase letters, a number, and a special character (?!#, etc.) in order to have a strong enough password to protect your account.
Now that you are all signed up and are able to log into your account, you can get started installing WordPress!
Installing WordPress
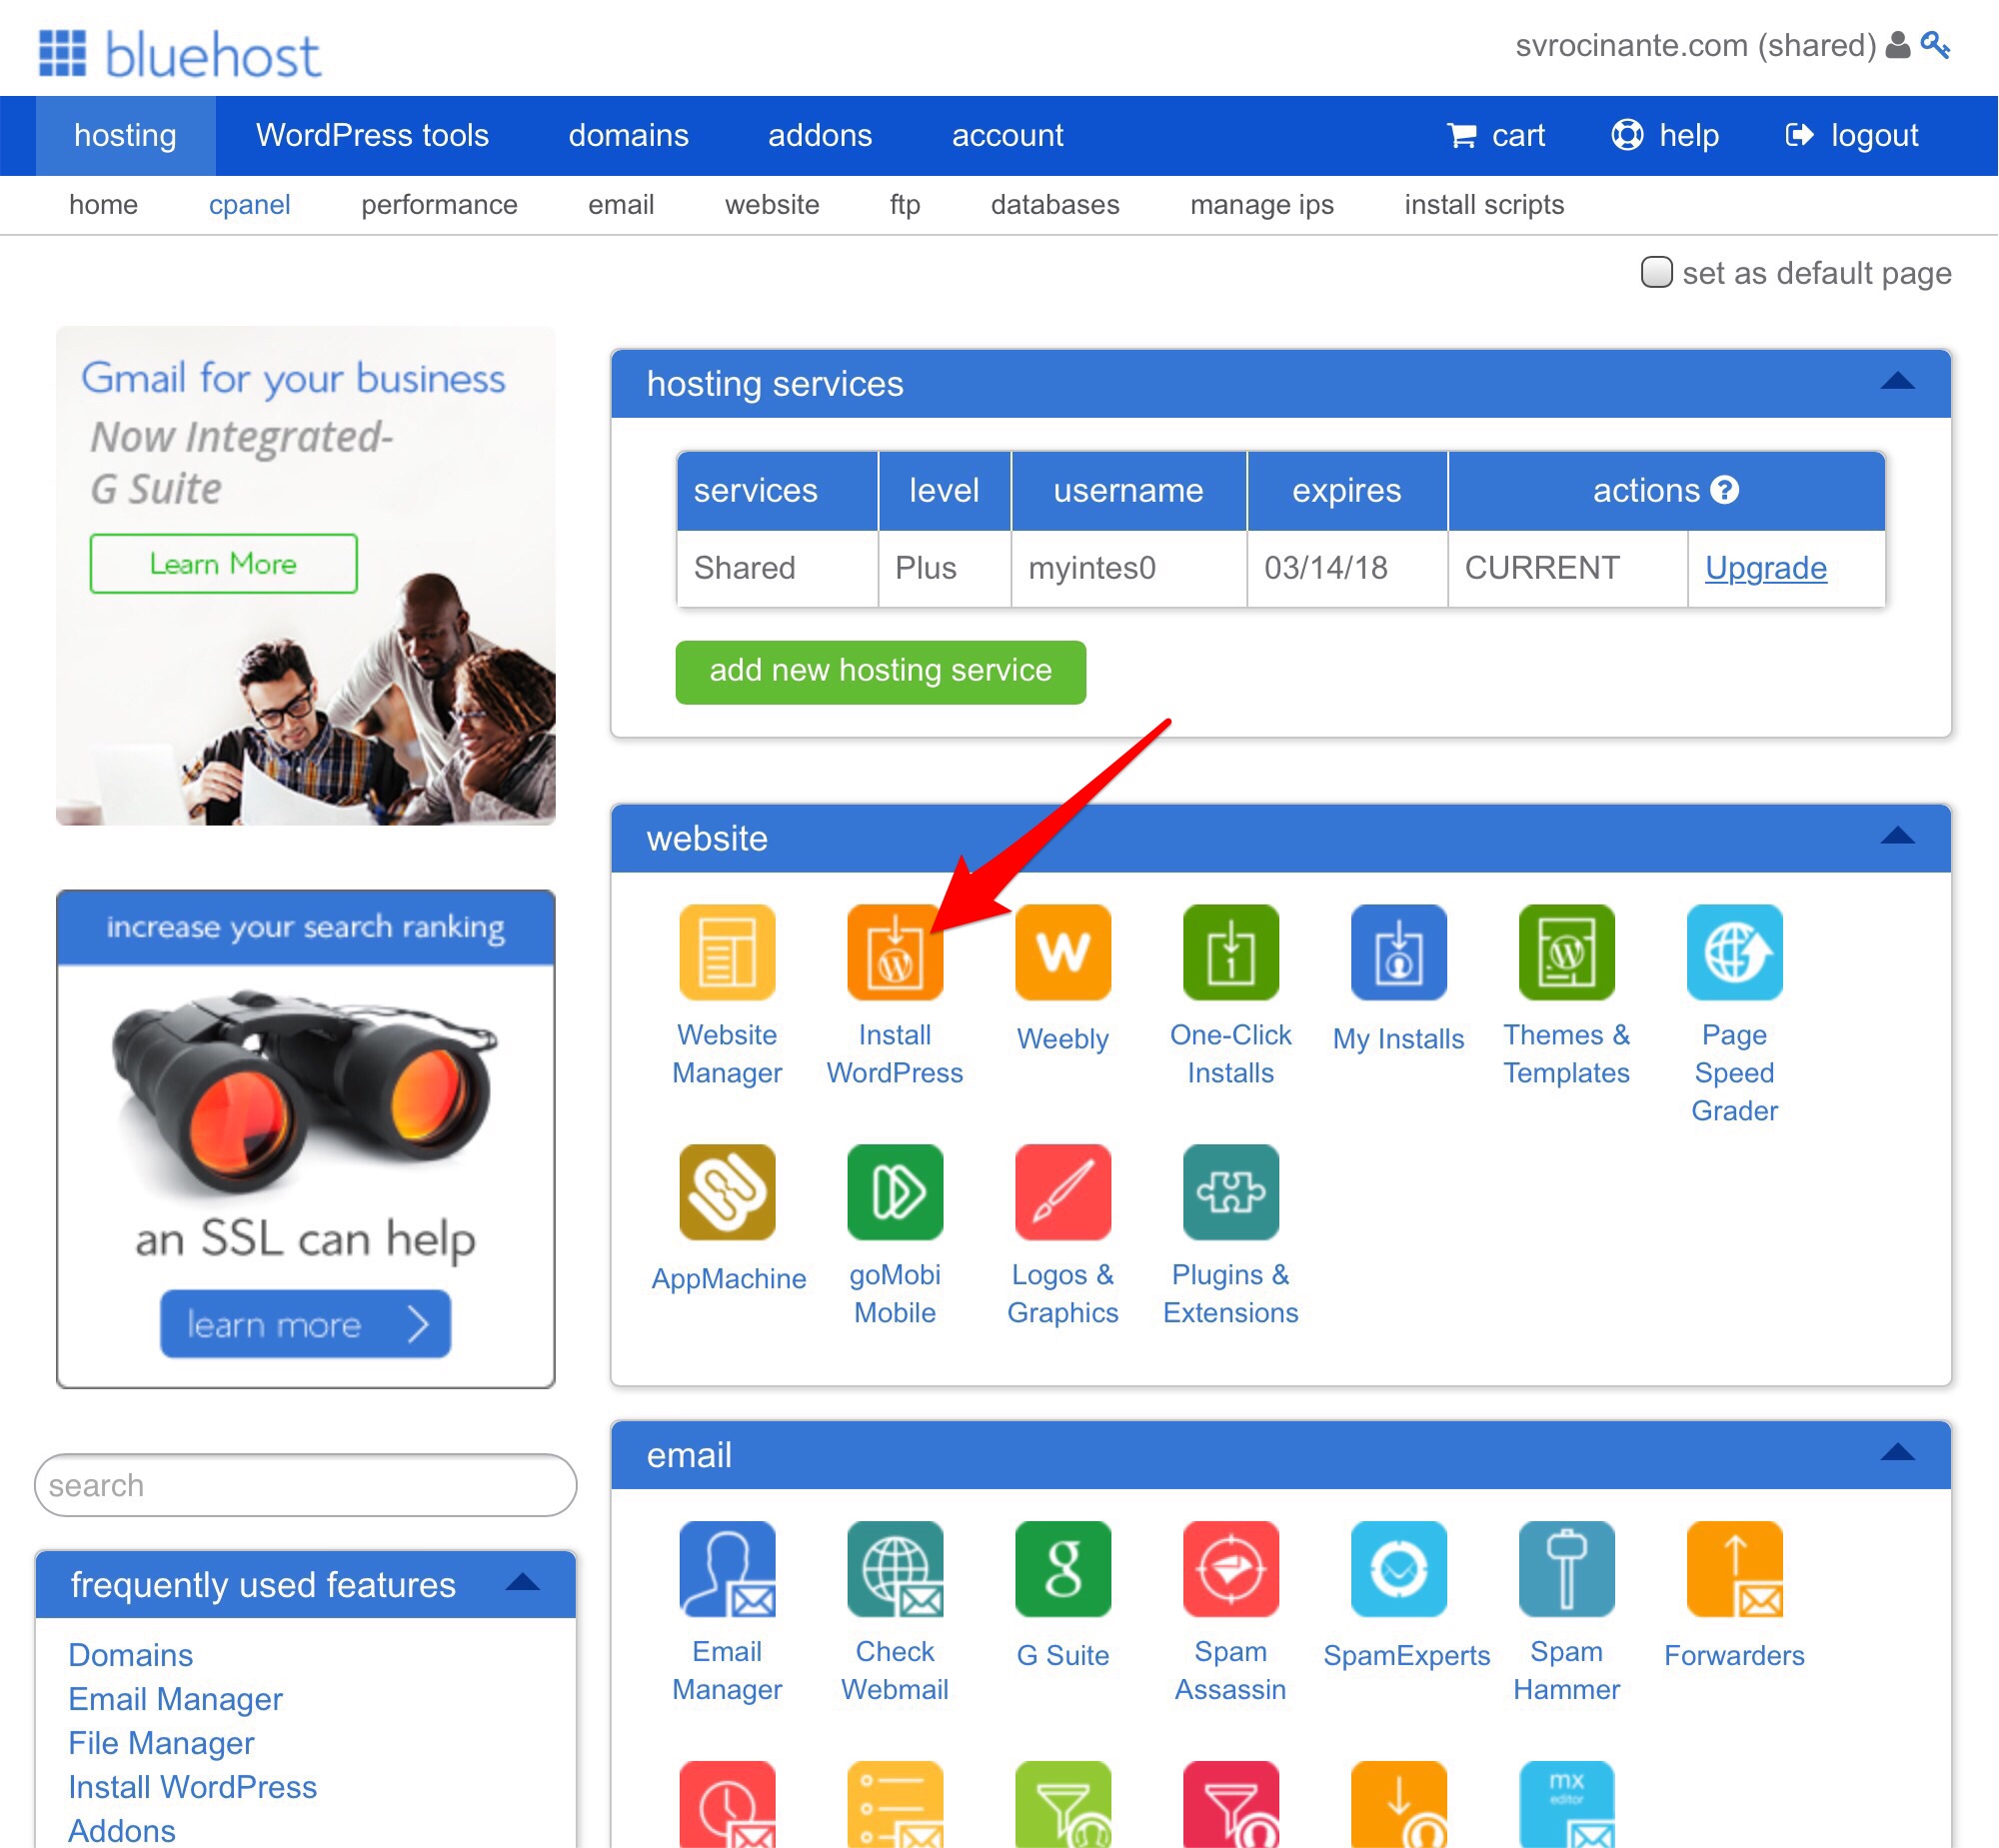
This may seem like the most complicated step, but Bluehost has worked hard to make this one of the easiest things for you to do by using the new MOJO Marketplace for installing WordPress and other applications. In your cPanel, scroll down to,the website section and click on the Install WordPress icon.
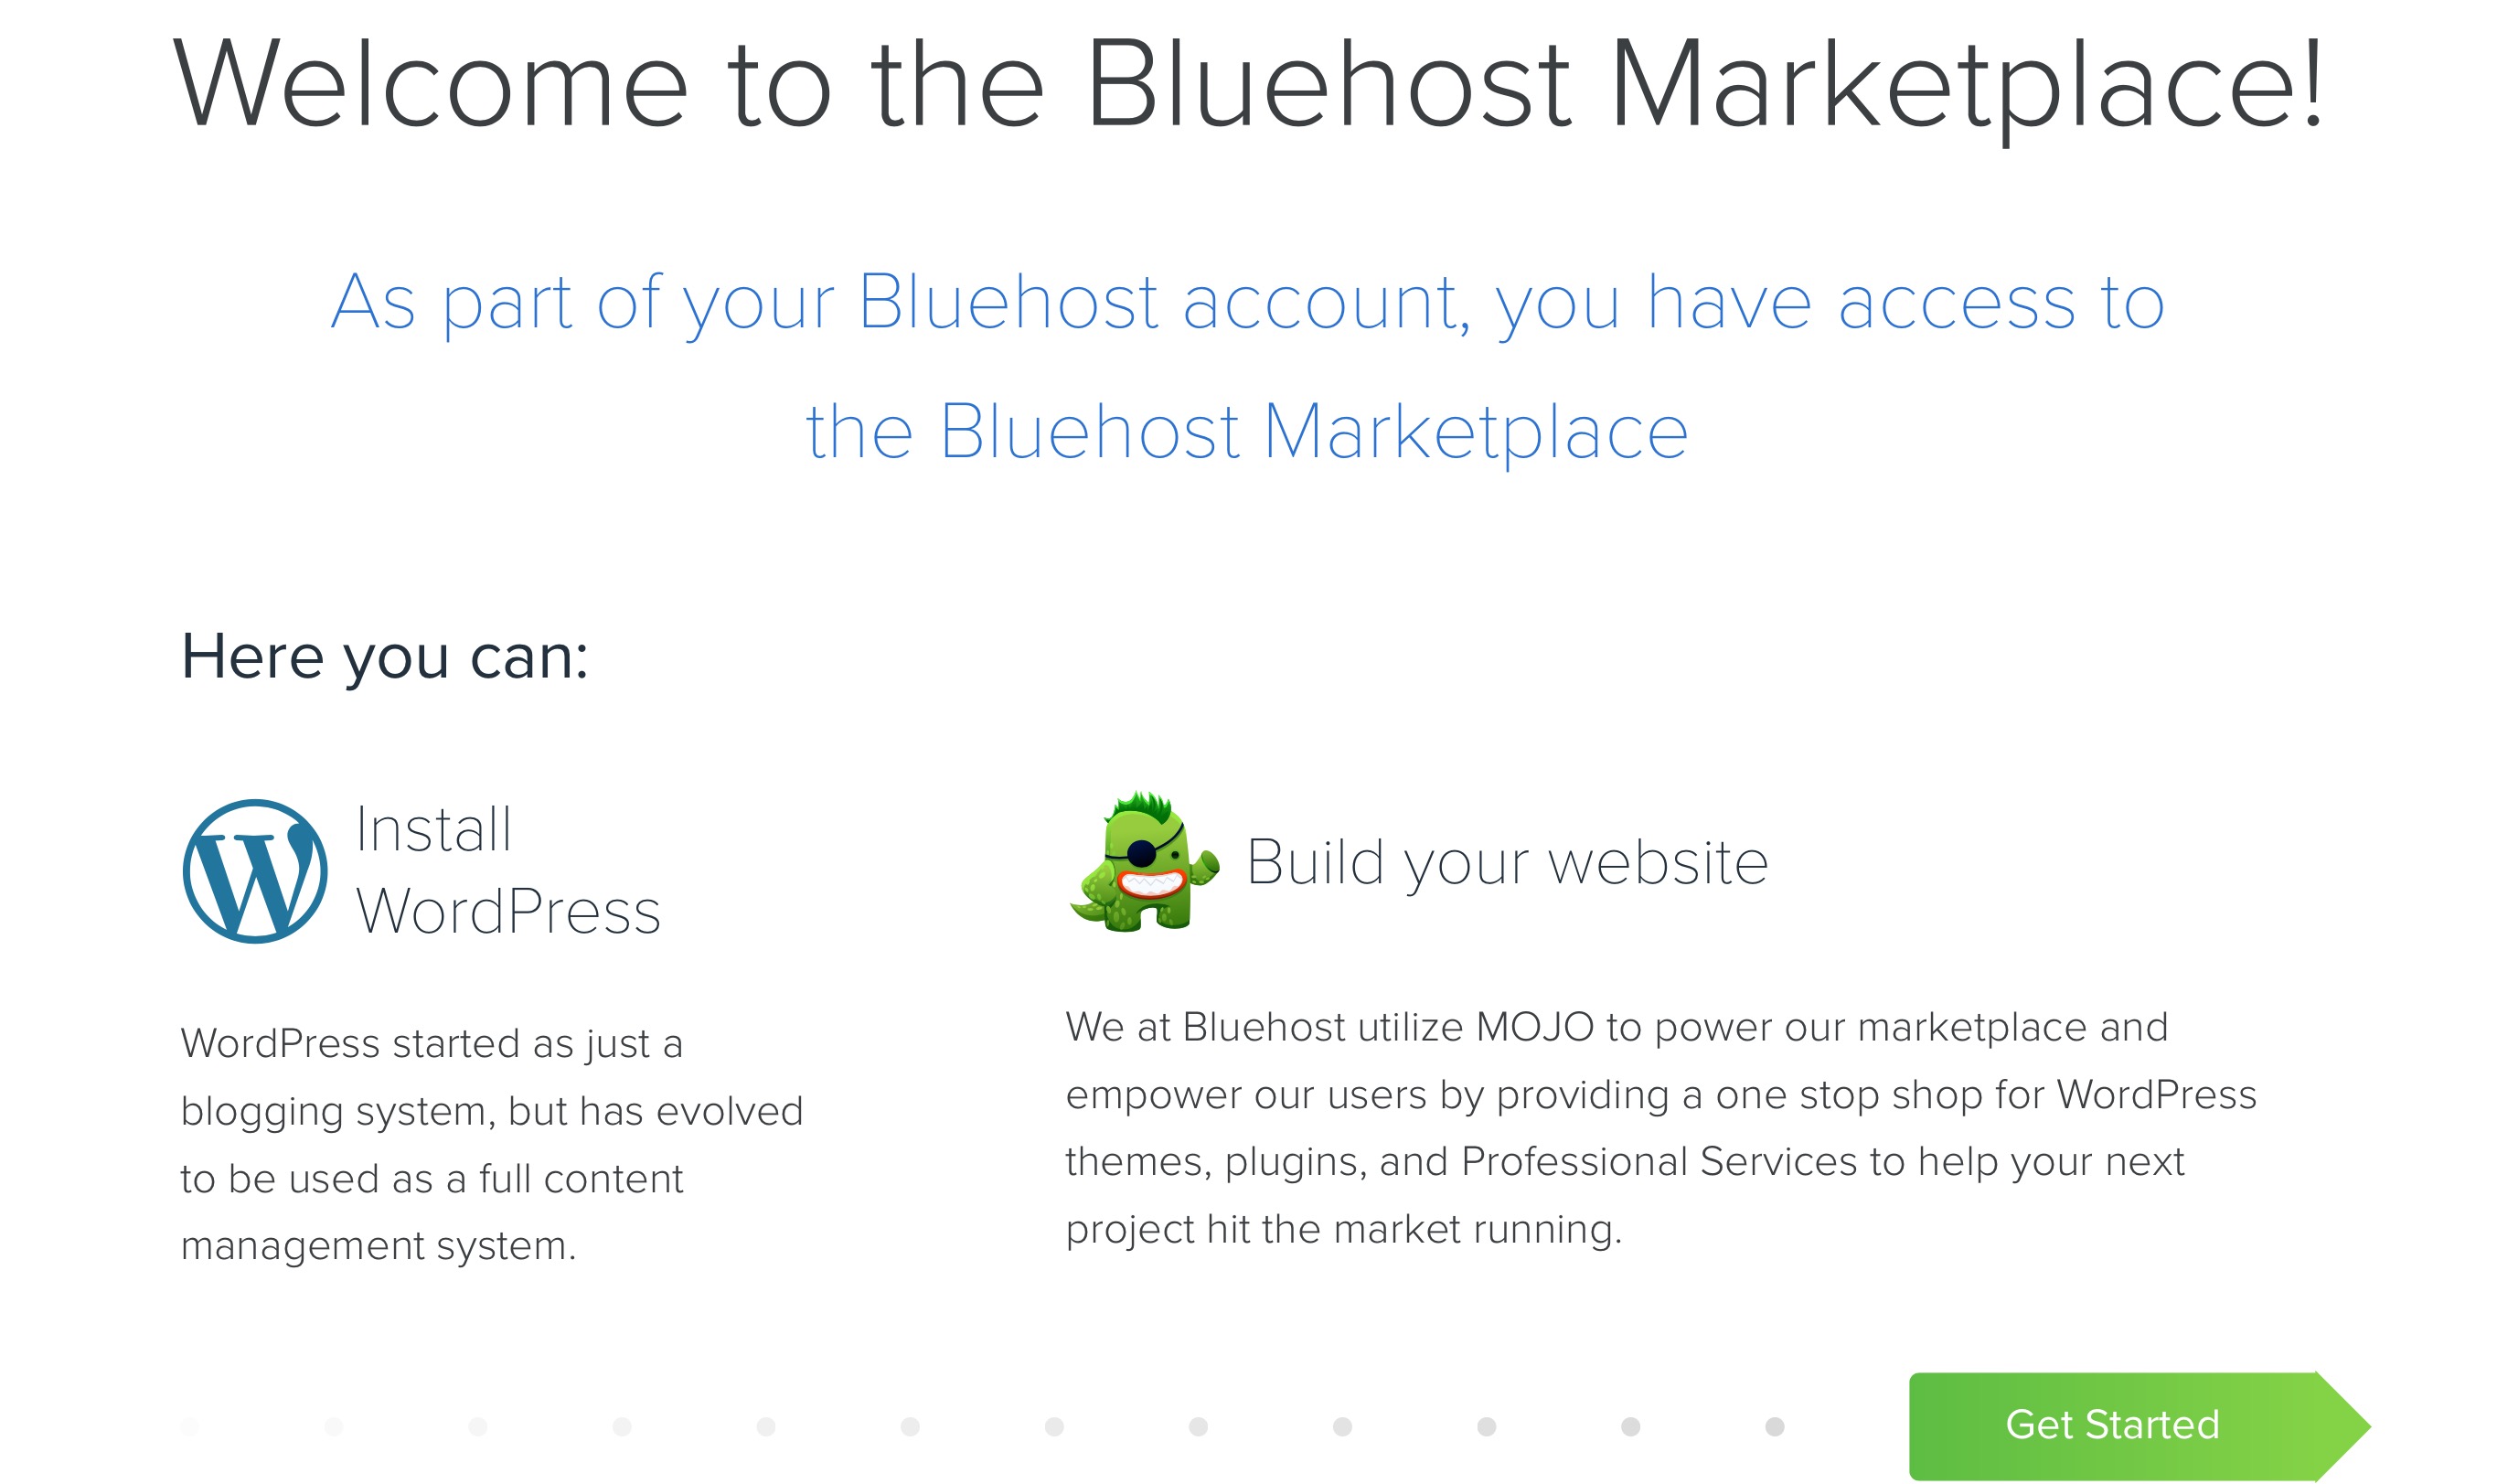
This will take you to the Bluehost Marketplace; just click on the Get Started button to kick off your WordPress install.
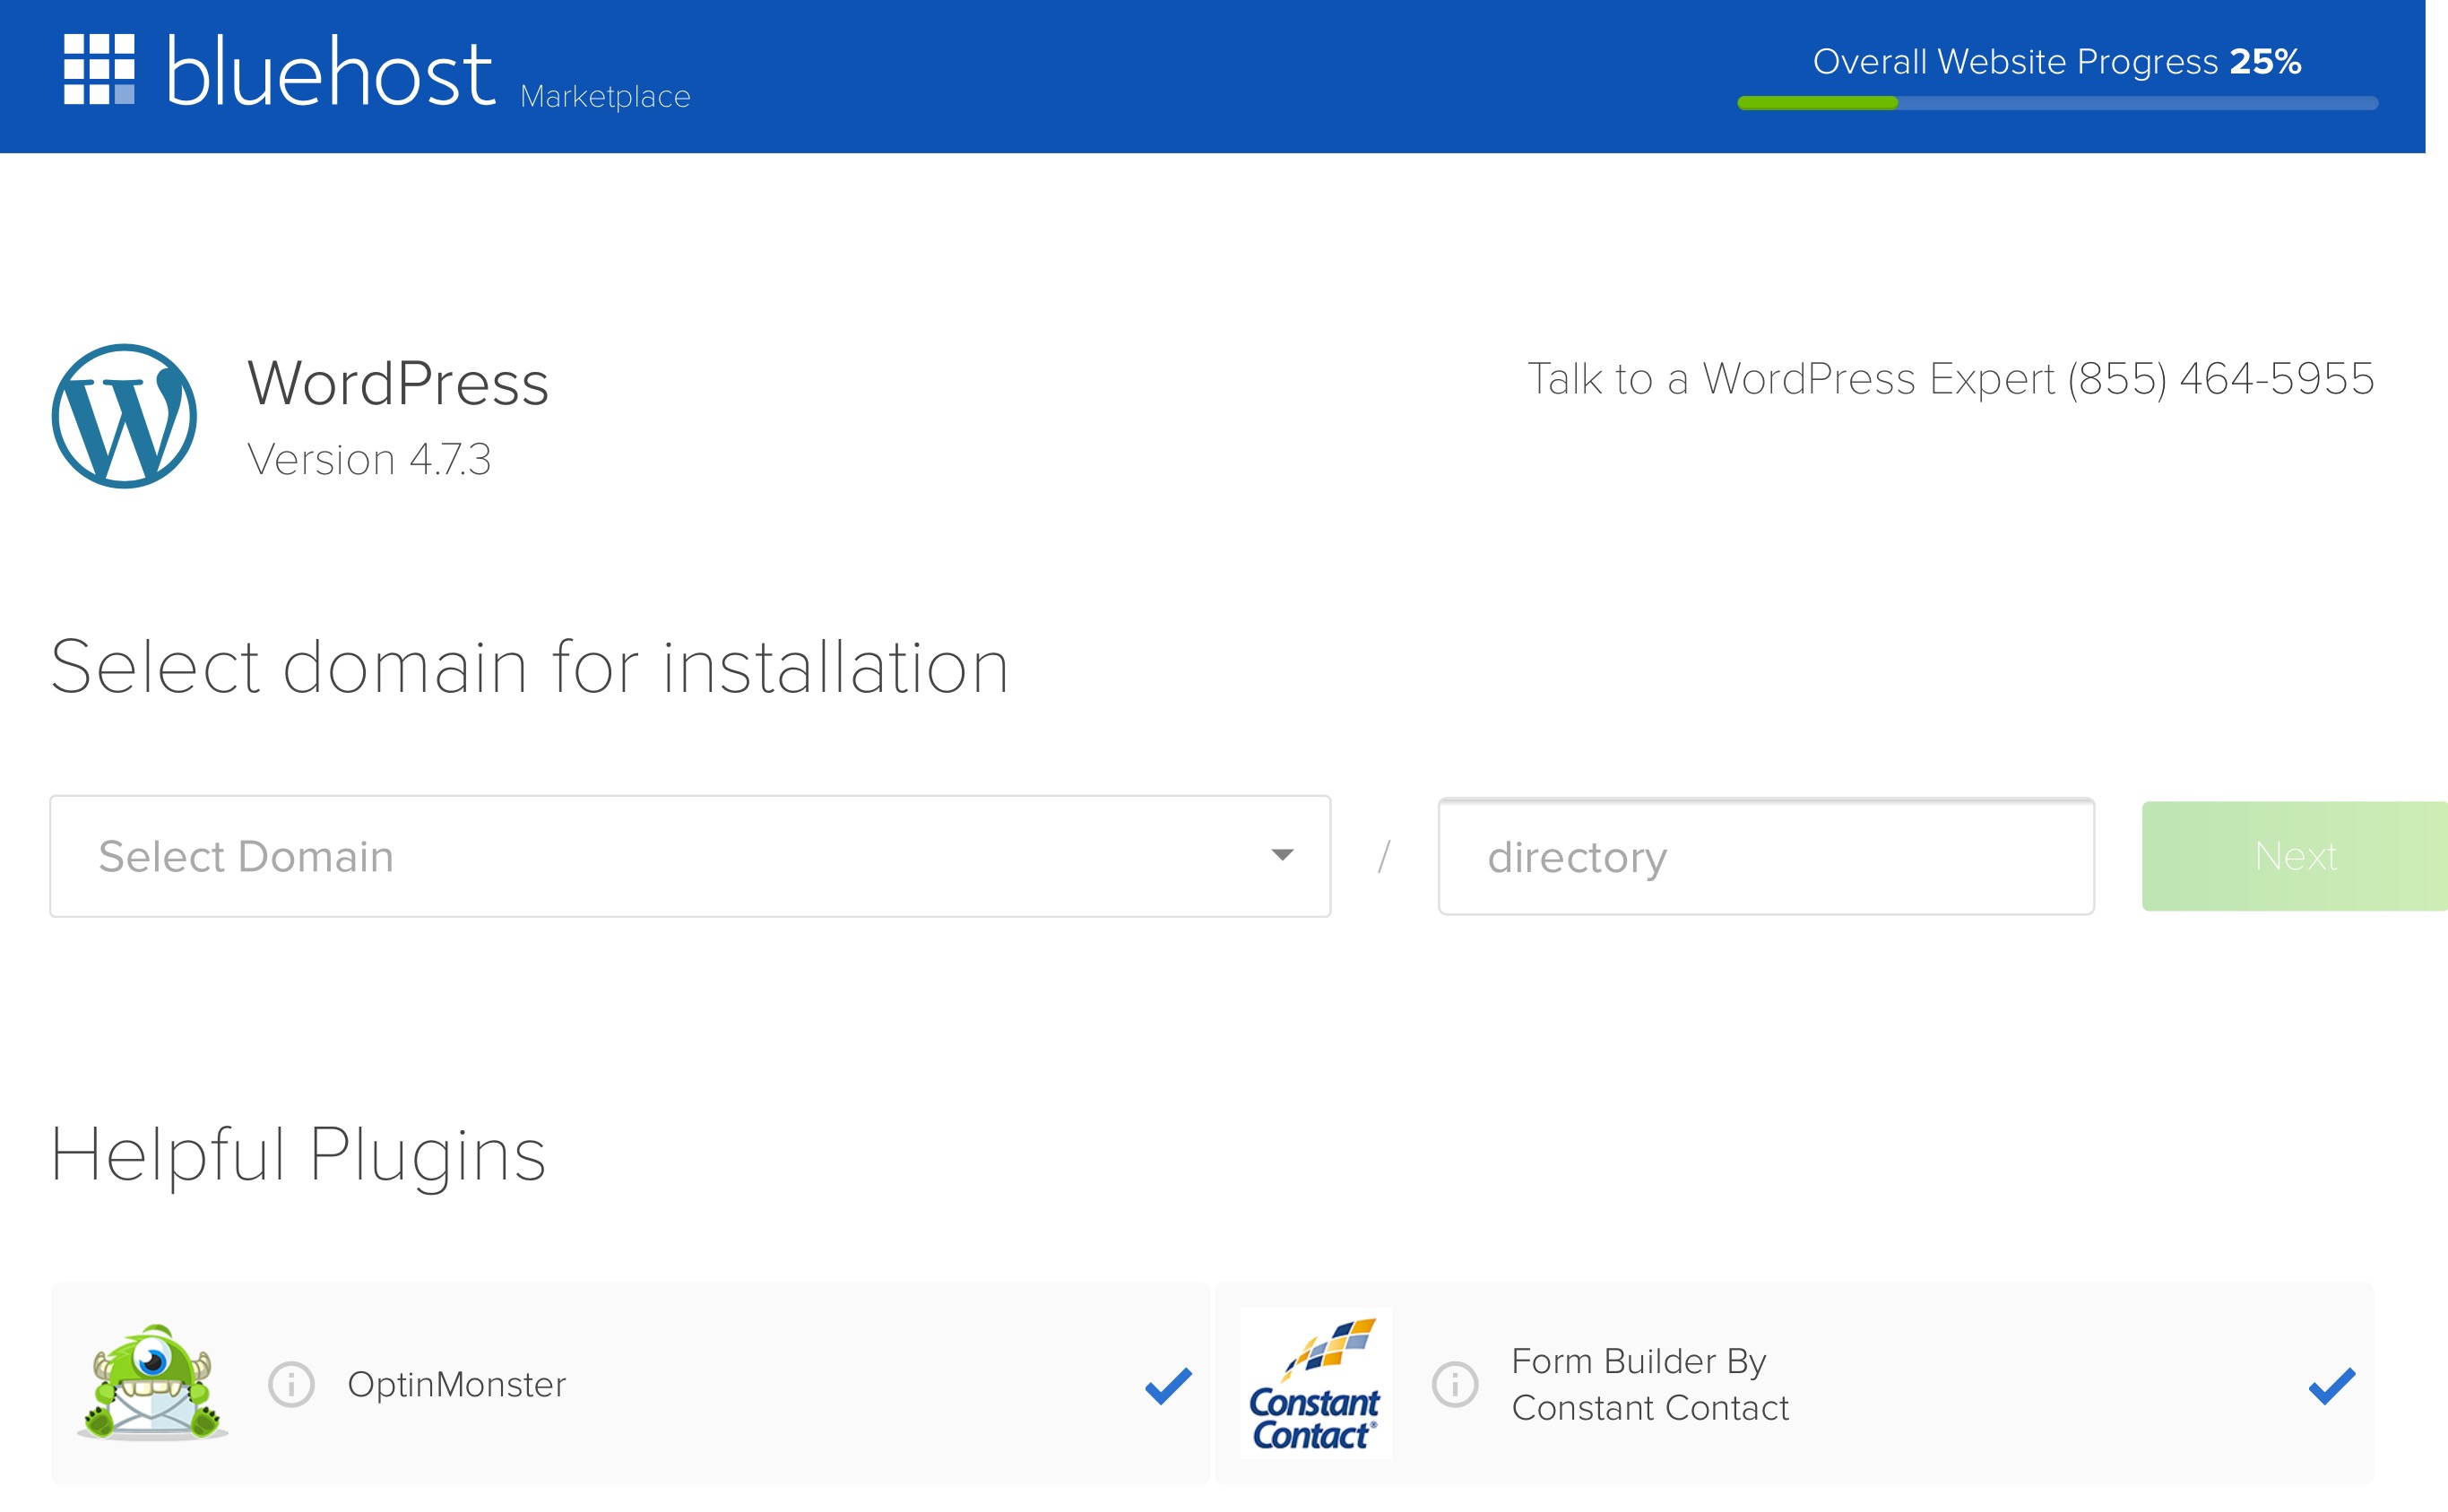
Step 1: Choose where you want to install WordPress. This can be any domain on your account, or a subdomain or a folder for one of your domains. As a first time user, I’d suggest you simply pick your domain name from the list (trust me, you’ll soon have more than one to pick from) and click on the Next button.
Step 2: This section allows you to set up your own username and password for your WordPress install. It’s strongly recommended that you use a different username than “admin” and a very strong password.
Step 3: Confirm that the “Automagically create a new database for this installation” box is checked as well as the other two boxes indicating understanding and accepting terms, etc. then click “Install”
Give it a minute or two until you get the “Installation Complete” message.

Step 4: You’ll receive your credentials via email, but you can also click on the link the says “view credentials here”
It will provide you with the admin login URL, your username, and password.
Now you can log into your WordPress site by going to the admin login URL. Enter your username and password, then click “Log In.” This will take you to your very own WordPress dashboard!
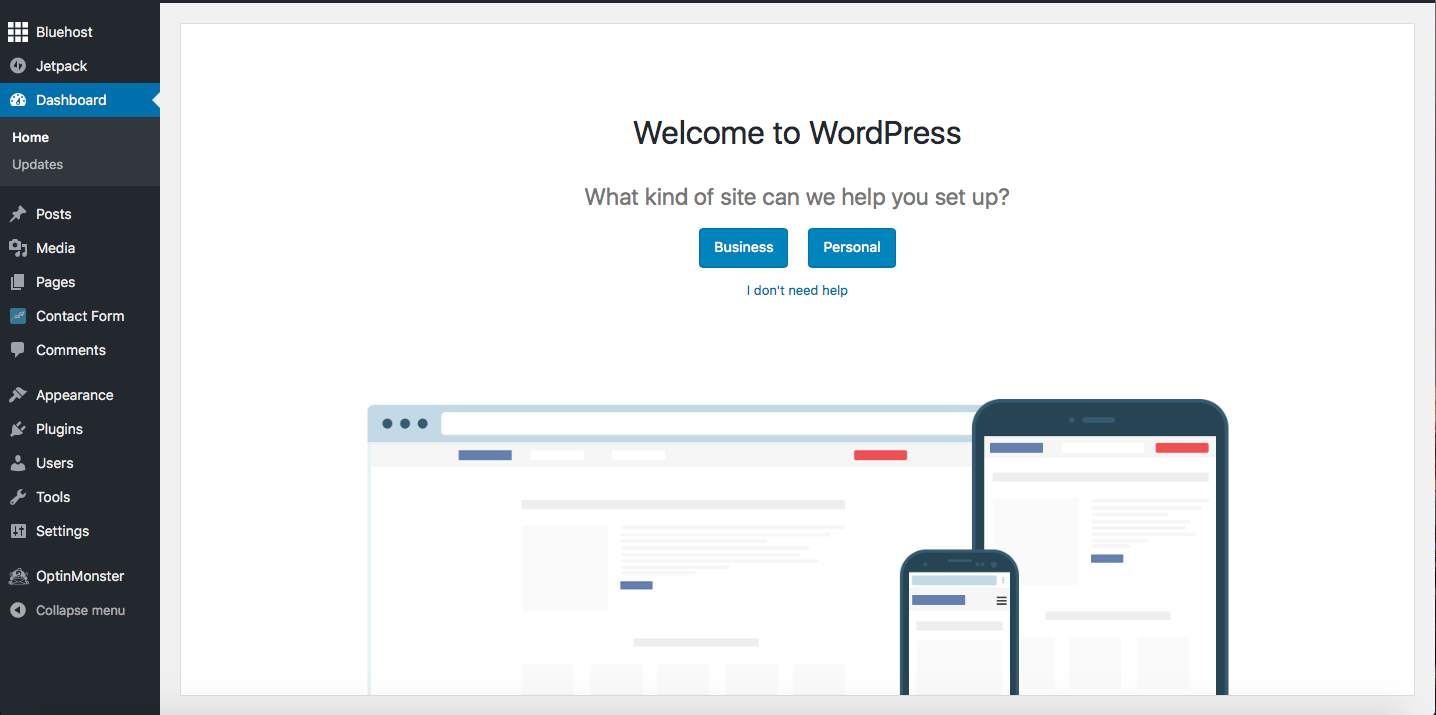
From here, you can control everything to do with your WordPress site, such as creating pages, writing posts, and changing the appearance. Remember, if you sign up through this tutorial, you’ll receive a special offer of shared hosting at $3.95/month for 36 months, as well as a free domain name for a year!
Enjoy!